
When an engine overheats or a cooling system leak is suspected, one of the first diagnostic steps a mechanic performs is a coolant pressure test. This definitive assessment determines if the cooling components can hold pressurized coolant without any drops in the closed system.
What is a coolant pressure tester kit?
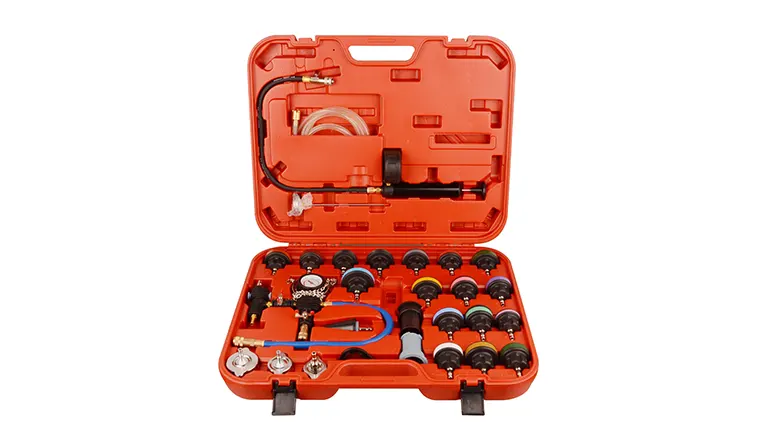
A coolant pressure tester kit is an essential tool for diagnosing issues in a vehicle’s cooling system. It allows a mechanic to check for leaks and test the system’s ability to hold pressure. Knowing how to use a coolant pressure tester properly is important for getting accurate test results.
Understanding the Kit Components
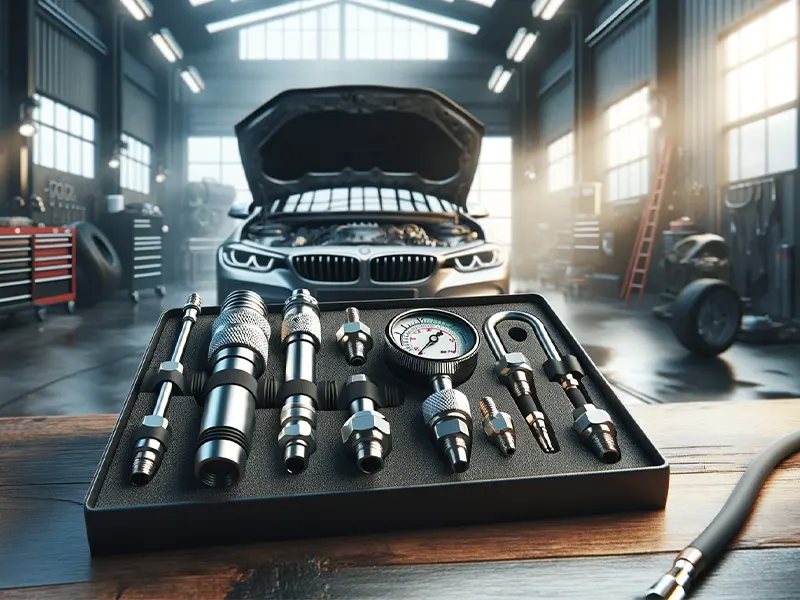
Coolant tester kits contain several components that work together to monitor cooling system pressure. While specific parts may vary, most kits include:
- Pressure gauge – The gauge shows pressure readings in PSI (pounds per square inch) or bar when connected. Common ranges are 0-30 PSI or 0-2 bar.
- Adapters – Adapters connect the gauge and other parts to components like the radiator cap or coolant reservoir. Kits usually have adapters for universal applications.
- Hand pump – The hand pump is used to pressurize the system by pumping a pressure bulb or lever. This allows testing pressure build up.
- Relief/bleeder valve – The relief valve safely bleeds off pressure to lower system pressure. The bleeder valve serves a similar purpose.
- Hoses – Hoses route fluid and pressure between components. They often use quick-connect fittings for convenience.
Performing a Coolant Pressure Test
Doing a coolant pressure test involves careful preparation and following specific steps:
- Preparation – The engine must be completely cooled off to ensure safe temperatures for working. The vehicle should be parked safely in neutral/park gear. Protective equipment like gloves and eyewear should be used.
- Kit setup – Connect the pressure gauge and hoses to adapter fittings, then attach adapters to radiator fill necks or the coolant reservoir.
- Pressure build up – Use the hand pump to pressurize the cooling system. Most vehicles specify a pressure between 14-17 PSI when cold. Confirm target pressure in a repair manual for the vehicle if possible.
- Leak detection – With pressure held steady, inspect all cooling system components and seams for leaks. Watch for drops in gauge pressure and inspect connections if the needle drops. Leaks may create bubbles/drips that can be felt or heard.
- Interpretation – Consistent pressure at the upper limit indicates no leaks. Drops in pressure flag one or more leaks in the cooling system. Very low readings signal major issues.
- Depressurization – Use the relief valve to bleed off all system pressure safely once testing completes.
Storage and Cleaning Recommendations
Properly storing a coolant pressure tester kit and cleaning it after use helps maintain accuracy and working order. Here are some best practices:
- Store the gauge, pump, and other sensitive parts in a clean, dry location protected from dust and moisture. The original carrying case or protective box makes an ideal storage container.
- Neatly wind up any loose hoses and secure fittings to prevent kinks or cracks over time.
- Clean any spilled coolant from exterior surfaces using a soft cloth dampened with water or isopropyl alcohol.
- Flush hoses thoroughly with clean water after use and allow interior surfaces to dry completely before storage to prevent buildup.
- Check batteries before off-season storage. Replace weak batteries in digital gauges to prevent leakage.
Following these basic storage and cleaning steps will help a coolant pressure tester kit last for years while remaining in accurate working condition for whenever it’s needed next.
Tips for Maintaining the Coolant Tester Kit
To keep a coolant pressure tester working properly for years to come:
- Store gauges and delicate components safely in padding to prevent damage.
- Rinse hoses and fittings with clean water after use to prevent dried coolant blockages.
- Check kit condition before winter storage. Replace worn parts and battery as needed.
- Follow manufacturer calibrating and servicingbasicsfound in most operation manuals.
Proper storage, cleaning, and maintenance will keep a coolant tester kit performing accurate pressure tests for many years of use in the shop or garage. Handled with care, these affordable kits provide invaluable service for diagnosing cooling faults.

John Smith, a Los Angeles-based car specialist and automotive writer, boasts over 20 years in the industry. With a background as a master technician and a decade-long writing stint at notable automotive publications, John now shares his expansive knowledge on CarFinite, simplifying car maintenance for readers.